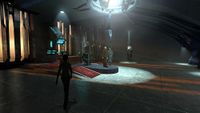
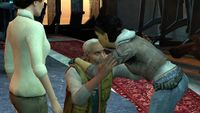
Half-Life 2 storyline
This article describes the Half-Life 2 storyline, chapter by chapter.
Contents
- 1 Setting
- 2 Chapter 1: Point Insertion
- 3 Chapter 2: "A Red Letter Day"
- 4 Chapter 3: Route Kanal
- 5 Chapter 4: Water Hazard
- 6 Chapter 5: Black Mesa East
- 7 Chapter 6: "We Don't Go To Ravenholm..."
- 8 Chapter 7: Highway 17
- 9 Chapter 8: Sandtraps
- 10 Chapter 9: Nova Prospekt / Entanglement
- 11 Chapter 10: Anticitizen One
- 12 Chapter 11: "Follow Freeman!"
- 13 Chapter 12: Our Benefactors
- 14 Chapter 13: Dark Energy
- 15 Narrative
- 16 See also
- 17 References
Setting[edit]
The original Half-Life takes place at the Black Mesa Research Facility in 200-. During an experiment, researchers at Black Mesa accidentally cause a Resonance Cascade which rips open a portal to Xen, a parallel universe, and the only known borderworld. Creatures from Xen flood into Black Mesa via the portal and start killing everyone in sight. The player takes on the role of Dr. Gordon Freeman, one of the research scientists who has been involved in the accident, and who now must escape the facility.
At the end of the game, a mysterious figure referred to as the G-Man extracts Gordon from Xen, where he defeated the leader of most of the Xen forces, the Nihilanth, and "offers" a job to Gordon. Forced to agree, Gordon is subsequently put into stasis for approximately twenty years.
Chapter 1: Point Insertion[edit]
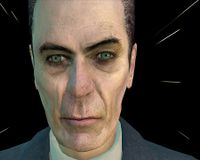
- "Rise and shine, Mr. Freeman. Rise and shine."
- ― The G-Man[src]
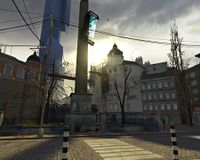
Half-Life 2 begins with the chapter Point Insertion which serves as an introduction to the game world. Here, the player begins to learn of the events that took place and what the Earth has become in the intervening time period between Half-Life and Half-Life 2. The player learns this information through the characters he meets as well as hints from the environment.
Approximately two decades post the Black Mesa Incident,[1], the enigmatic G-Man rouses Gordon Freeman from stasis, inserting him into a train bound for City 17. Engaging conversations among fellow passengers within the same compartment shed light on urban life and the intricacies of relocation. Upon reaching the station, Gordon disembarks into a world dominated by the formidable interdimensional empire, the Combine. The sight of armed Civil Protection officers and the imposing image of Dr. Wallace Breen on a colossal screen mark his initial encounter with the dystopian reality.
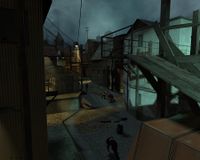
Upon being stopped at a checkpoint, Gordon is subsequently directed into a compact interrogation room where he encounters Barney Calhoun, a former Black Mesa security guard now operating incognito as a Civil Protection officer. Initiating contact with Dr. Isaac Kleiner, the trio strategizes, ultimately deciding to guide Gordon to Kleiner's Lab. However, due to Barney's need to maintain cover, Gordon must independently navigate the perilous journey. Amidst the labyrinthine cityscape, the distant Citadel looms ominously. Negotiating through apartment complexes, Gordon unwittingly becomes embroiled in a Civil Protection raid, narrowly escaping peril and, fortuitously, being rescued by Alyx Vance, a courageous young woman and daughter of Dr. Eli Vance.
Chapter 2: "A Red Letter Day"[edit]
- "This is a red letter day. We'll inaugurate the new teleport with a double transmission."
- ― Dr. Kleiner[src]
This chapter mostly consists of character interaction, introduction, and plot exposition, setting up Gordon Freeman's goal for the next two chapters.
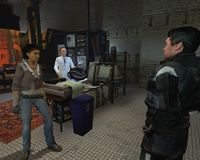
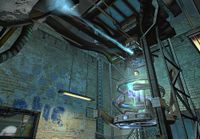
Gordon finds his way to Kleiner's lab with Alyx's help, with Alyx revealing more information about the state of the world and Wallace Breen. It is revealed that Dr. Breen was formerly the administrator at Black Mesa during the events of Half-Life. Alyx explains that she is part of an underground network known as the Resistance and has been helping people escape the city on foot; she also reveals that they have just developed a 'better way' of moving them, which turns out to be a teleport. At Kleiner's lab, it is decided that Gordon and Alyx should be teleported to Black Mesa East, the laboratory where Alyx's father Dr. Eli Vance is heading the resistance's scientific research operations. After meeting Kleiner's pet headcrab Lamarr, Gordon receives the Mark V HEV Suit, the upgraded version of his old HEV suit from the Black Mesa Incident. Alyx is teleported to Black Mesa East successfully. When trying to teleport Gordon, however, Lamarr leaps onto him, causing the machine to malfunction and teleport him to various random places, including a desert, twice at Black Mesa East, the middle of the ocean (where he is almost eaten by an Ichthyosaur), and Breen's office in the Citadel, alerting the Combine to his presence. Finally ending up outside the lab where he started, Gordon is forced to head on foot to Black Mesa East by himself. Before he leaves, Barney gives him the infamous crowbar Gordon used at Black Mesa, telling him that he needs to travel through the extensive canal system of City 17 to reach his destination. As Gordon begins the journey, the Citadel is seen changing formation, and swarms of city scanners are seen flooding out in response to Gordon's arrival.
Chapter 3: Route Kanal[edit]
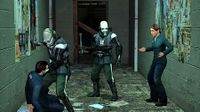
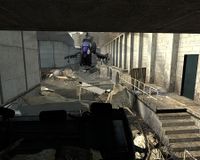
This chapter details the first half of Gordon's journey to Black Mesa East through the canal network and reveals further information about the state of the Earth, the organization of the resistance, and the operation of the Combine forces. In this lengthy chapter, Gordon travels through the underground railroad, a network of resistance bases located along the canals established to help refugees escape. Gordon is continually on the run, being chased by the Combine, and the few resistance shelters he finds are quickly raided by Civil Protection, either being shelled or flooded with Manhacks. Gordon acquires his first firearm, the 9mm Pistol, and engages in frequent combat with Civil Protection forces as well as familiar alien enemies such as Barnacles, Headcrabs, and Zombies closer to the end.
Trivia[edit]
The name of the chapter is a reference to the term root canal, the space within the root of a tooth, and the name of a dental procedure involving removal of the contents of the root. The name was also inspired by the Polish film Kanał which Marc Laidlaw had watched early during Half-Life 2's development.[2]
Chapter 4: Water Hazard[edit]
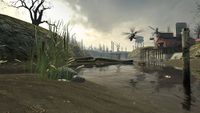
This chapter details the second half of Gordon's escape from City 17 through its canal system to Black Mesa East. Aboard an airboat, he fights off numerous Civil Protection units and a Hunter Chopper.
Trivia[edit]
The name of the chapter may be a reference to the golf term water hazard.
Chapter 5: Black Mesa East[edit]
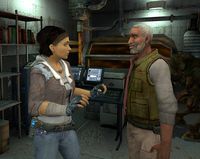
This chapter sees Gordon reaching his destination, Black Mesa East, after a series of chases through the canals. Gordon meets Dr. Judith Mossman for the first time and is reunited with former Black Mesa scientist and current resistance leader, Eli Vance, along with Alyx. Gordon is also introduced to the Zero Point Energy Field Manipulator, also known as the Gravity Gun, a physics manipulator that quickly becomes indispensable, and Dog, Alyx's robotic "pet." Alyx takes Gordon to the scrapyard in order for him to practice with the Gravity Gun. Along the way, they pass by a sealed off tunnel to a place called 'Ravenholm', of which Alyx speaks fearfully. While Gordon is playing with Dog in the scrapyard, Alyx spots Combine Scanners sweeping the area, shortly before an all-out aerial raid on Black Mesa East. While attempting to rejoin the others, Gordon and Dog are separated from Alyx by a collapsed ceiling, and Gordon is forced to escape down the tunnel to Ravenholm.
Like "A Red Letter Day," this chapter is full of insight and dialogue about the current state of the world, the people in it, and the aftermath of the Black Mesa Incident.
Chapter 6: "We Don't Go To Ravenholm..."[edit]
- "That's the old passage to Ravenholm. We don't go there anymore."
- ― Alyx Vance[src]
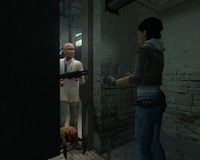
This chapter details Gordon's journey through the ghost town of Ravenholm. Originally a hidden village that lived free from the rule of the Combine, it was discovered and attacked by hundreds of Headcrab Shells, transforming almost the entire population into deadly Zombies. This chapter also introduces two new headcrab variants, the Poison Headcrab and the Fast Headcrab, and their zombie counterparts. The chapter title is a reference to a comment made by Alyx Vance in the preceding chapter while showing Gordon around the base. Gordon makes his way through the town, fighting zombies and avoiding bizarre man-made deathtraps. Gordon eventually meets the man who set them up: Father Grigori, a mentally unstable man claiming to be a priest and possibly the sole survivor of the shelling. Grigori gives Gordon a shotgun and guides him through the town. Gordon and Grigori join at the church and make their way to an old mine with a path leading back to City 17. After battling through the graveyard to the mine entrance, Grigori decides not to leave with Gordon, opting to remain in the town. As Gordon departs, Grigori continues fighting the zombies until he disappears into a fire inside a crypt.
Chapter 7: Highway 17[edit]
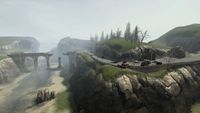
In this chapter, Gordon is informed that Eli Vance has been captured and taken to Nova Prospekt and sets out on a journey along Highway 17 to rescue him, making use of a resistance Scout Car with a tau cannon attachment. He encounters Combine Soldiers for the first time, as well as a new type of alien, the Antlions. Colonel Odessa Cubbage is also met in this level, giving Gordon the RPG, which Gordon uses to defend a resistance outpost from a Combine Gunship.
This chapter is full of insight on the environmental damage done to the Earth caused by the Combine invasion. The water levels along the coast are seen to be drastically receded, with ships stuck on the sand and docks a good distance away from the water, implying mass drainage of the oceans by the Combine. The water is also discovered to be filled with deadly leeches. Earth fauna are entirely absent save for the occasional seagull, having been wiped out by the invasive Xen species. There are also many old houses located along the coast, some being home to resistance members and escaped refugees, most having been raided by Combine troops.
Chapter 8: Sandtraps[edit]
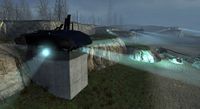
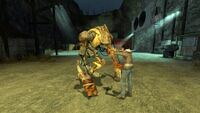
This chapter details the second half of Gordon's journey to Nova Prospekt. After crossing through the last part of the coast without the Scout Car, he encounters the first Antlion Guard. After defeating it, an ally Vortigaunt extracts a pheropod from the body which allows Gordon to control Antlions. The Vortigaunt trains Gordon in its usage at a nearby resistance camp. Gordon then continues along the coast, leading groups of Antlions and battling his way through Nova Prospekt guards set up in bunkers on his way into the prison.
Trivia[edit]
The name of the chapter may be a reference to the golf term sand trap, also known as bunkers.
Chapter 9: Nova Prospekt / Entanglement[edit]
Chapter 9: Nova Prospekt[edit]
In the chapter "Nova Prospekt", Gordon Freeman leads an assault on the Combine-controlled facility known as Nova Prospekt, a former Soviet gulag, now a major installation for Overwatch forces. Gordon's primary objective is to rescue the captured Resistance leader, Eli Vance, who is being held prisoner within its walls.
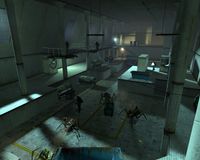
To aid in the attack, Gordon harnesses the support of a formidable army of Antlions using a glandular sac nicknamed "Bugbait." With their help, he manages to breach the facility's defenses, fighting his way through waves of enemies, including Prison Guards, Sentry Guns, Headcrabs, Zombies, and even two powerful Antlion Guards.
Throughout the intense assault, Gordon makes steady progress, eventually reaching the facility's train depot. During this time, he also intercepts a prerecorded message from Dr. Breen. In the message, Dr. Breen expresses his frustration and displeasure with the transhuman forces for their failure to capture Gordon, berating them for their incompetence.
In the latter part of the chapter, Gordon is reunited with Alyx Vance. They join forces to uncover Judith Mossman's collaboration with the Combine and rescue Eli from the Combine.
Chapter 9a: Entanglement[edit]
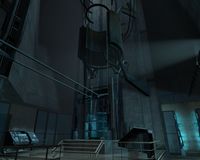
In this chapter, Gordon Freeman rendezvous with Alyx Vance at the Nova Prospekt train depot. Their primary objective is to search the facility for both Eli Vance and Judith Mossman, all the while facing fierce opposition from the Combine forces.
Throughout their mission, Gordon and Alyx temporarily split up, but they eventually reunite to track down Judith. Alyx hatches a plan to use the Combine teleporter to transport themselves, along with Eli and Judith, to safety at Kleiner's Lab. However, in a critical moment, Judith seizes the opportunity to escape with Eli to the Citadel.
Facing imminent danger from the advancing Combine forces, notably Combine Elites who make their first in-person appearance, Gordon valiantly defends their position, providing the chance for Alyx and himself to escape through the teleporter. Their journey leads them back to Kleiner's Lab in City 17.
Chapter 10: Anticitizen One[edit]
Upon arriving in Kleiner's Lab after teleporting away from the Depot, Gordon Freeman and Alyx Vance discover they have been stuck in a teleport "loop" for a week's time. They learn that their teleport caused the destruction of Nova Prospekt, and the blow they struck there was taken as a sign to begin the Uprising. The two factions have been locked in combat for a week and all of City 17 is a warzone. Gordon goes on to aid in the battle, while Alyx remains in the lab to help Kleiner escape the city. Dog initially fights alongside Gordon but is separated from him as he attempts to destroy a Combine dropship, getting carried away by it in the process. Gordon joins up with various squads of citizens, and together they fight their way through the city towards Barney's location. Near the end of the chapter, Alyx returns to help Gordon but is captured by Combine soldiers and taken to the Citadel.
Chapter 11: "Follow Freeman!"[edit]
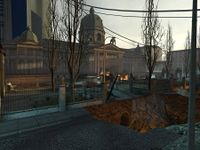
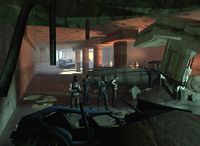
This section involves heavy urban combat, aided by resistance members, against Striders, Gunships, and both regular and elite Combine Soldiers.
Gordon teams up with Barney, together leading a battle at the Overwatch Nexus and disabling a generator powering a suppression device that is hampering resistance attacks, eventually fighting their way to the foot of the Citadel. There, they encounter Dog who is running rampant through the streets looking for Alyx. Dog provides a pathway into the Citadel by lifting up a portion of a Combine Smart Barrier, allowing Gordon through.
Chapter 12: Our Benefactors[edit]
This chapter, also known as Benefactory,[3] details Gordon's infiltration in the Citadel. It is also a playground for the newly charged Gravity Gun, having many Combine Soldiers and Elites to battle.
After making his way into the Citadel through use of a Stalker pod, Gordon is caught in a Combine weapon confiscation field. This destroys most of his weapons except for the Gravity Gun, instead causing the field to malfunction and overcharge it. The Gravity Gun becomes "supercharged", making it much more powerful and capable of picking up and throwing organic beings. Making use of this newly-acquired weapon, Gordon fights his way through the Citadel against large numbers of Combine soldiers as Dr. Breen attempts in increasing desperation to convince Gordon to surrender. Gordon is forced to enter another Stalker pod and is quickly discovered on camera, transferring him to the top of the Citadel directly to Breen's office.
Chapter 13: Dark Energy[edit]
The final chapter details the climactic confrontation between Wallace Breen, Gordon Freeman and the leaders of the Resistance.
After being transported to Dr. Breen's office, Gordon is reunited with Eli Vance and Alyx Vance who are both being kept captive in Stalker pods as well. Dr. Breen tries once again to gain the allegiance of Eli, but after being refused, he prepares to send Gordon, Alyx, and Eli through a portal to the Combine Overworld. Dr. Breen also hints at the G-Man's influence, stating that Gordon's "contract was open to the highest bidder." Mossman protests, but after being brushed off by Breen, decides to intervene, releasing Gordon, Alyx, and Eli. Breen attempts to escape, fleeing to the Dark Energy Reactor at the very top of the Citadel to be transported himself to the Combine Overworld. Gordon gives chase, fighting his way through Combine soldiers along the way. Just as the portal to the Overworld opens, Gordon attacks the reactor using his Dark Energy-infused Gravity Gun, causing the reactor to fail and go critical. Just as the reactor explodes, the G-Man freezes time and addresses Gordon. The G-Man congratulates him on his success, stating that he has received "interesting offers" for Gordon's services. Gordon is put back into stasis by the G-Man who then leaves through a door of light with the final words: "In the meantime, this is where I get off."
The fates of Breen, Eli, Mossman, and Alyx is left unknown at the ending of the game, but Eli, Mossman, and Alyx's fates are revealed in the sequel. Breen's fate still remains unrevealed, however.
Narrative[edit]
Like in its predecessors, Gordon never speaks and the player views the action through his eyes only throughout the entirety of Half-Life 2. There are no cutscenes, nor any discontinuities or jumps in time from the player's point of view. Due to the lack of cutscenes, the player never directly sees what happens in Gordon's absence. Some have criticized these design decisions as narrative holdovers from Half-Life,[4] that effectively limit how much of the backstory is explained, however many have also highly praised the game's method of storytelling.[5]
The ending of Half-Life 2 is also very similar to that of the original: after completing a difficult task against seemingly impossible odds, Gordon is extracted from reality by the G-Man. Gordon is smugly congratulated and told that "further assignments" should follow. The fates of many of the major characters, such as Alyx, Eli, and Judith, are left unexplored. Very few of the questions raised by Half-Life are answered, and several new ones are presented. The identity and nature of the G-Man remains a mystery. A number of these issues are addressed, however, in the sequel games, Episode One and Episode Two.
See also[edit]
- The Orange Box Achievements for Half-Life 2
- Locations in the Half-Life and Portal universe for Half-Life 2
References[edit]
- ↑ Half-Life 2: Episode One official website
- ↑
 Tweet: "RIP Andrezj Wajda. Watched KANAL early on in HL2 development. (Thus the terrible title, “Route Kanal.”)" @marc_laidlaw (Marc Laidlaw) on Twitter (October 9, 2016) (archived)
- ↑ Half-Life 2 Prima Guide
- ↑ Half-Life 2 for PC Review. GameSpot. Retrieved on October 10, 2005.
- ↑ Analysis: On Half-Life 2 - Build It And They Will Come
