Unforeseen Consequences
| |
| Unforeseen Consequences | |
|---|---|
| Game information | |
| Designer(s) |
Brett Johnson[1] |
| Map(s) |
|
| Previous chapter | |
| Next chapter | |
Unforeseen Consequences is the third chapter of Half-Life.
Contents
Overview[edit]
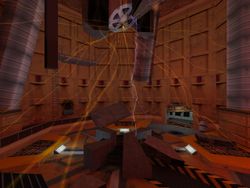
The chapter begins in the ruins of the test chamber after the incident. As a result of the resonance cascade, a dimensional rift has opened between Earth and the alien world Xen, causing hostile lifeforms to invade the facility. Gordon Freeman is told by his science team colleague Eli Vance to head to the surface to make a call for help. The player must travel through the devastated remains of the labs as alien creatures begin to teleport in. As the transit system is out of service, the player has to go through the previously inaccessible areas in Sector B, the Coolant Reservoir Facility and the attached canal system, to reach an elevator which takes him to the Administration Center in Sector D.
In Half-Life 2: Episode Two, the chapter's name is alluded to. The G-Man uses Alyx Vance to relay the words "prepare for unforeseen consequences" to her father, Eli. Eli later reveals that the same message was used before by the G-Man to warn him moments after Gordon had entered the test chamber at Black Mesa.
Development[edit]
Alpha[edit]
The Portal Device is the predecessor of Unforeseen Consequences and is the first chapter in the Alpha version of the game. While the chapter was cut following the game's significant reworking in late 1997, some sections survived in modified forms into the final game. The most notable reused locales are the computer room, the entrance's large metal doors with retracting security bars, the broken airlock door at Sector B's security checkpoint, and the fans in the same area.
Pre-release[edit]
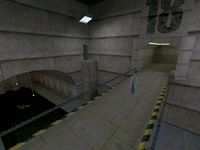
Little is known about the early versions of this chapter. There was to be a keycard puzzle in Sector B which was cut. The canal portion was present in the 1997 version of the game and initially much larger with more Bullsquids present. The path nodes for their navigation be can found in the final map. The bridge, which is destroyed in the released game, was still intact in this iteration, and there was an unreachable door in the corner of the room. Both ends of the canal underneath were explorable. In the final game, there is a large wooden gate on the right end along with a push entity behind the grates preventing entry.
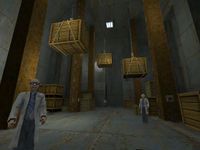
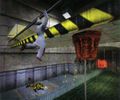
The pre-release form of the hanging crates room appears to have featured a puzzle. The player may have been meant to adjust the position of the crates by using the buttons and then jump on them to reach a new area. It should be noted that the early appearance of the room, especially the look and the placement of the columns, resembles the warehouse from the multiplayer map Stalkyard which was also created by Brett Johnson. In the final version of the room, the player simply has to jump across a number of suspended boxes to travel over an open chasm.
The released version of the crate room contains some entities left over from its previous incarnation. These include two path nodes on the catwalk and a blood decal on a wall at its entrance. There are also two static gears on the blocked tracks with names (gear3 and gear4), suggesting they once moved or rotated. These are most likely related to the mechanism used for transporting crates from one location to another as seen in some images. It is possible the player and other characters (a scientist can be seen standing on a crate in a screenshot) could ride on these crates to reach other areas.
Other versions[edit]
The PlayStation 2 port features some changes to the maps. The security guard who dies while reaching for a health charger was replaced with a static corpse, most likely because of a technical issue which can be seen in a screenshot. In the map c1a1b, the scientist who watches his colleague gets pulled into an air duct was moved closer to the airlock.
The map c1a1a is censored in the German release of the port. The Headcrabbed scientist and some of the nearby blood decals were removed. The demo for the PlayStation 2 version features a trimmed portion of the chapter. It ends before the player can jump down to the drainage tunnels, instead immediately loading the next chapter, Office Complex. In the Dreamcast version, the level select code for the chapter is "Gordon Teaches Physics". The Source version contains a couple of test maps that include portions of the chapter.
Behind the scenes[edit]
According to the audio script for the game, Eli Vance was to say "Be careful, Gordon" after operating the retinal scanner.[4] The scripted sentence entity for the scene uses sc_console5 which does not exist. The correct sentence name is sc_console5a. This may be an error or an intentional disabling of the line. The unused entities in this area also indicate that there was to be a Zombie, internally named hidden_bully, in the test chamber's control room. It is possible that it was to get killed by the electrical beams emitting from the chamber.
The destroyed tram station scene with the scientist on the collapsing bridge was built by series writer Marc Laidlaw.[5][6] While being just a section of a bigger map (c1a1f) in the final game, at some point during the development this scene occurred on its own separate map, c1a1g, which is based on the last map of Black Mesa Inbound. This design was ported to the Source version of the game, the map file is also included in the later versions of Day One, but is not used.
In the SDK, there is an animation for the Panther Eye which is indicated by its filename, panther_fall_c1a1b, to have been intended for this chapter. The animation shows the creature jumping forwards and then falling down. This scene is known to also involve a scientist as it is located in a folder called panther_scientist_fall. The accompanying animation for the scientist, scientist_fall_c1a1b was leaked in 2018, alongside the Half-Life: Source scientist model sources. The creature was to push the scientist to his death.
The elevator[edit]
During the game's development, Gabe Newell stated there was a design meeting where they discussed how all action games were nothing but button puzzles. A couple of days later, Brett Johnson invited Gabe into his office to show a scene he created in Half-Life. At the elevator leading to the test chamber, there was a sparking call button with a warning sign close by. When the button was pressed, it triggered a scripted scene in which the elevator plummets down the shaft, sending the group of onboard scientists to their demise. This sequence served as both something that characteristically fit into the game, a described mixture of horror and dark humor,[7] as well as an inside joke for people in the industry.[8]
The canal[edit]
There are several numbers of unknown significance scattered throughout Sector B. The number 19 (as decals) is placed in the area where the G-Man is seen, the numbers 18 and 17 (as textures) were to be seen in the canal tunnels, and the number 15 (as decals) is present in the crate room but can't be seen due to being misplaced. The unused texture for number 16 can be found in the game files.
The canal area has many unused set pieces left over from the early versions. The room with the large lift has two metal panels on the walls. Activating the lift opens one of the panels which reveals a small space occupied by Headcrabs. The other dormant panel only has empty space behind it. At the bottom of the lift's shaft, there is an unreachable underwater area with a water wheel. It is blocked by metal pillars and contains nodes and push entities.
The appearances of the large lift, the entrance to the canal,[9] and the canal itself[10] were based on designs from the manga Akira.[11] In the manga, the main characters enter a secret military base beneath the Olympic Stadium through the sewers. It is said the place appeared to be a sewage treatment plant from the outside. The character Akira is being stored here in a cryogenic chamber at the bottom of the lift. The iconic lift also appears in the expansions, Opposing Force and Blue Shift.[12]
Trivia[edit]
In the plasma cells room, the Headcrab in the third glass tube is supposed to explode when the player approaches it. While it functions in the initial release of the game, this sequence no longer works in the updated releases due to the code changes. The creature cannot see through the glass and attempt to leap at the player, dying in the process. The entity name of the first Vortigaunt who breaks down the door is georgeclinton (map c1a1b). George Clinton is an American funk music artist.
Gallery[edit]
Pre-release[edit]
Retail[edit]
Other[edit]
A sewer-themed area.[a]
It's a Wonderful Half-Life[edit]
Associated media[edit]
 Additional images related to Unforeseen Consequences
- Half-Life soundtrack
- Space Ocean
- Apprehensive Short
- Cavern Ambiance
 sewer.mpg on YouTube
Notes[edit]
- ↑ The choice of textures indicate that this may be a cut location from the chapter. The name of the map is
Sfan. It is described as a close encounter with the Human Assault class.[13]
References[edit]
- ↑ Half-Life section on Brett Johnson's personal website (June 5, 2016) (archived)
- ↑ 2.0 2.1 Half-Life 2: Raising the Bar, page 39
- ↑ Half-Life 2: Raising the Bar, page 40
- ↑ Half-Life Audio Script
- ↑ Tweet: "The HL screenshot in that article is the ONE SCENE I built myself." @MarcLaidlaw on Twitter (July 9, 2013)
- ↑ Half-Life interview on WarZone Online Gaming Magazine (archived)
- ↑ Elevator to Lower Test Chamber on Brett Johnson's personal website
- ↑ Next Generation magazine, Issue 48 (December 1998)
- ↑ Akira, Volume 2, page 28
- ↑ Akira, Volume 2, page 40
- ↑
 Brett Johnson's comment on YouTube: "It is absolutely from Akira. I built it."
- ↑
 Half-Life - Akira Elevator Reference on YouTube
- ↑ Half-Life Alpha (version .61) Notes (
Half Life Main v6.doc) (August 26, 1998)
