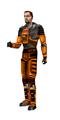
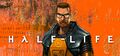
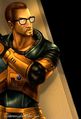
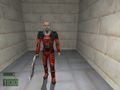
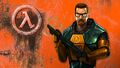
Gordon Freeman
This article is about the main protagonist of Half-Life and Half-Life 2. For his predecessor, see Ivan the Space Biker. |

| |
| Gordon Freeman | |
|---|---|
| Biographical information | |
| Homeworld | |
| Born | |
| Function(s) / Belongings | |
| Rank / Occupation |
|
| Sponsor | |
| Weapons | |
| Equipment |
|
| Vehicles | |
| Physical description | |
| Species |
Human |
| Gender |
Male |
| Hair color |
Auburn |
| Eye color |
Green |
| Chronological and political information | |
| Era(s) | |
| Faction |
|
| Game information | |
| Voiced by |
N/A |
| Modeled over |
Half-Life 2 |
| Designer(s) |
|
| Entity |
player |
- "Man of few words, aren't you?"
- ― Alyx Vance[src]
Dr. Gordon Freeman is the main protagonist of the Half-Life series. He is a theoretical physicist who is forced to defend himself and the human race against hostile aliens and other enemies following the Black Mesa Incident. In the process, he becomes a legendary Resistance hero, eventually becoming one of the leaders of the uprising against the Combine.
Contents
Biography[edit]
Background[edit]

Early life and MIT[edit]
A native of Seattle, Washington, Freeman showed great interest and aptitude in the areas of quantum physics and relativity at a young age. His earliest heroes were Albert Einstein, Stephen Hawking and Richard Feynman. At age 6, he even constructed a butane-powered tennis ball cannon.[1]
While visiting the University of Innsbruck in the late 1990s, Freeman observed a series of seminal teleportation experiments conducted by the Institute for Experimental Physics. Practical applications for teleportation became his obsession, and he eventually attended the Massachusetts Institute of Technology (MIT), in which Isaac Kleiner became his mentor. In 1999, he received his doctorate (Ph.D.) from MIT with a thesis paper entitled Observation of Einstein-Podolsky-Rosen Entanglement on Supraquantum Structures by Induction through Nonlinear Transuranic Crystal of Extremely Long Wavelength (ELW) Pulse from Mode-Locked Source Array (essentially about the teleportation of matter through extremely dense elements).[1]
Working at Black Mesa[edit]
Disappointed with the slow pace and poor funding of academic research (and with potential tenure a distant dream), Freeman looked for a job in the private sector. Incidentally, Kleiner had taken charge of a research project being conducted at the Black Mesa Research Facility, located somewhere in the New Mexico desert. He was looking for a few bright associates, and Gordon was his first choice, although Judith Mossman also applied for the position. Considering the source and amount of funds available to the Black Mesa labs, Gordon suspected that he would be involved in some sort of weapons research, but in the hopes that practical civilian applications would arise in areas of quantum computing and astrophysics, he accepted Kleiner's offer.[1]
At the start of Half-Life on May 16, 200-, the day of the Black Mesa Incident, Gordon Freeman is 27 years old[2][3]and has no dependents.[1] He works at the Black Mesa facility where he holds a Level 3 Research Associate position.[2][3] He is accommodated in the Level 3 Dormitories in the Black Mesa South Wing, alone in room 309.[2][7] The identity of his administrative sponsor is classified to him,[2] but this individual is later indicated to be the G-Man.[4][5]
He is assigned to the Anomalous Materials department doing nuclear, subatomic, and quantum research. Despite having obtained a Ph.D. from the prestigious MIT, the laboratory work that the player actually does as Freeman (pressing a button and pushing a cart) does not require any intellectual expertise at all. Barney Calhoun pokes fun at this in the beginning portion of Half-Life 2, when Freeman performs similar "technical" assistance (pushing a switch and attaching a fallen plug back into a socket). Barney then goes on to joke that Gordon's MIT education "really pays for itself".

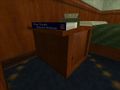
In Half-Life, the picture of a baby with beside an adult hand making a "thumb's up" can be found in Freeman's locker.[8] Although the baby in the picture is Harry Teasley and Yatsze Mark's daughter Isabel,[9] and the picture was officially explained as being an Easter egg placed by the level designer, Marc Laidlaw offered the idea that it could be an infant relative of Gordon's, such as a niece.[10] The locker also contains the books The 37th Mandala and The Orchid Eater by Marc Laidlaw, as well as what seems to be Gordon's diploma in a frame, a thermos and a cup, an HEV Suit battery, two sticky notes, and apparently a blue suit. After the Resonance Cascade, the thermos fell on the floor and the diploma fell on its face.
As told by Alyx in Half-Life 2: Episode One, Freeman and Calhoun would compete with each other to be the first to retrieve Dr. Kleiner's keys whenever he locked them in his office in Black Mesa (apparently a fairly regular occurrence) without resorting to conventional means. This is reputedly where Freeman learned to make use of ventilation shafts to infiltrate rooms and buildings. Indeed, Gordon and Barney crawled through numerous ventilation shafts in Half-Life and Half-Life: Blue Shift respectively.
Appearances[edit]

Half-Life[edit]
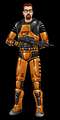
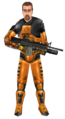
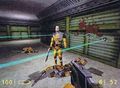
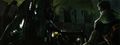
On May 16, 200- at 7:30, Freeman is being instructed by Gina Cross' holographic assistant counterpart for an HEV Suit Training. This is Half-Life's Hazard Course.[2][3] At 8:47, he starts his tram ride from Level 3 Dormitories at Black Mesa. He is 30 minutes late. Around 9:00, Gordon and his team perform an experiment on sample GG-3883 in Sector C's Anti-Mass Spectrometer. The experiment goes wrong (possibly intentionally, due to outside manipulation[11]) and triggers a Resonance Cascade. As a result, the space-time continuum is ruptured, allowing alien lifeforms to enter the Black Mesa facility. They immediately start killing any humans they can find. Freeman finds himself hunted by two groups: the invading aliens and later the Hazardous Environment Combat Unit, a military cleanup team that has been sent to contain the situation, by silencing aliens and surviving personnel alike. Against all odds, the untrained theoretical physicist manages to survive the chaos (thanks in no small part to the HEV Suit he wears in his duties), impressing the few surviving scientists and security guards with his heroic acts while quickly becoming the HECU's top priority target.

After numerous challenges, and after eliminating countless aliens and soldiers, Freeman is eventually transported by a few surviving Lambda Team scientists to the alien homeworld of Xen, where he manages to eliminate the alien "leader", the Nihilanth. Upon recovering from his final encounter, Freeman is finally confronted by the mysterious G-Man, who has been observing Freeman from a distance throughout the entire game and perhaps even manipulating his fate. The G-Man shows Freeman several locations throughout Earth and Xen, before finally offering Freeman a choice: either agree to work for him and his mysterious "employers," or be left to die on Xen without any weapons and surrounded by hostile lifeforms. Half-Life 2 assumes that Gordon chooses to accept the G-Man's offer of employment.
Half-Life: Opposing Force[edit]
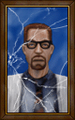
In Opposing Force, Adrian Shephard witnesses Gordon teleporting to Xen in the Lambda Complex, and any attempts to follow him through the same portal will result in a "temporal paradox" which sends Shephard falling through Xen's void and ends the game. An "Employee of the Month" picture of Gordon can also be seen in an office.
Half-Life: Blue Shift[edit]

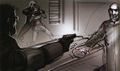
Gordon is seen three times by Barney Calhoun during the course of Blue Shift. Barney first sees Gordon waiting for the tram on a ledge which Barney passes by. A few moments later, Gordon can be seen riding by. He is also seen heading towards the HEV storage area through a surveillance camera (he passes by a scientist who greets him, and he obviously does not answer), and lastly being dragged to a trash compactor by a pair of HECU marines, without his glasses.
Half-Life: Decay[edit]
Although he is never actually seen in Decay, Gordon is mentioned several times throughout the course of the game. First by the first security guard to be met, who says: "The big guy was pretty excited today when he came in earlier. He was talking about the new guy, Dr. Freeman." Dr. Richard Keller also mentions "Dr. Freeman is running late today, again" (Gordon is actually around half an hour late; that also suggests it is not the first time). He also questions Freeman's skills, stating he does not understand what Isaac Kleiner sees "in that boy". Furthermore, Freeman's bedroom in the Area 3 Dormitories can be visited; on his nightstand can be seen a copy of the book "The Truth About Aliens" (by "RH", a nod to Gearbox's Rob Heironimus), also owned by Barney.
Half-Life 2[edit]

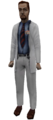
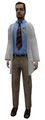
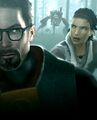
Half-Life 2 begins with the G-Man speaking to Gordon, waking him from an apparent altered state he put him in at the end of the last game. Like the ending of the original game, the scene is somewhat inexplicable and psychedelic, with the G-Man's face in extreme close-up fading in and out of visibility over backgrounds representing scenes from the original Half-Life as well as scenes Gordon will visit in the course of Half-Life 2. The G-Man delivers a typically cryptic speech, commenting that "the right man in the wrong place can make all the difference in the world." and concludes by telling Freeman to "wake up, and smell the ashes". According to the Half-Life 2: Episode One story page,[12] the G-Man kept Freeman "in stasis far from Earth, thought, and time itself" for "nearly two decades", which sets Half-Life 2 at 202-. It is also implied by Eli Vance that Freeman did not physically change during his stasis, in the words "My god man, you haven't changed one iota." said in Black Mesa East. Freeman then wakes up on a train with two Citizens being "relocated" to City 17, and as a Citizen himself (thus also wearing Citizen clothes[13]). One Citizen remarks that he did not see Freeman get on the train, implying that he was brought (perhaps teleported) onto the train in the middle of its journey. Freeman quickly learns that Earth has been conquered and occupied by the trans-dimensional Combine empire. He soon meets up with Barney Calhoun and Alyx Vance, and eventually joins the Resistance against the Combine.

During the course of the second game, Freeman battles the forces of the Combine in order to free humanity from its grasp. Already famous for his role in the Black Mesa Incident, Gordon quickly develops a legendary reputation among Earth's surviving human populace, who begin to refer to him by messianic titles such as "The One Free Man." Shortly after his arrival, and having killed a significant number of Civil Protection troops whilst attempting to escape City 17, the Combine designated him Anticitizen One, a title that indicates the individual posing the greatest threat to their empire. After slaying scores of Combine soldiers and leading an assault against the Combine stronghold of Nova Prospekt, Gordon eventually sparks a full-scale rebellion against the Combine domination, in which he becomes a prominent combatant. Gordon infiltrates one of the Combine's footholds on Earth, the City 17 Citadel, and destroys its teleport core by detonating the dark fusion reactor, rendering the Citadel inoperable. Although caught in the reactor's explosion along with Alyx Vance, Gordon is rescued by the G-Man at the last second, who tells Freeman that he is impressed with his work and has "received several tempting offers for his 'services'." The G-Man finally informs Freeman that, rather than offering him "the illusion of free choice", the G-Man has taken the liberty of choosing for him, and deposits Freeman back in stasis until he is needed once again. Thus, Half-Life 2 "concludes" just as cryptically as its predecessor did, with perhaps even more questions unanswered.
Half-Life 2: Lost Coast[edit]

In this cut level, Lost Coast, Gordon is lost somewhere from the main coast he was traveling down and is dispatched by an old fisherman to clear out a Combine staging area being used to shell a nearby town, St. Olga. Gordon starts off the map appearing at a dock and talking to the old man who explains what is needed of him. Gordon proceeds to fight his way up a mountain path, engaging Combine forces as he goes. After considerable fighting, Freeman makes it to a former monastery where the artillery platform is located. After destroying the mechanism, he is ambushed by multiple Combine soldiers and a pair of Hunter-Choppers. After clearing the area, he rides an elevator back down to the dock where he started. The old man congratulates him and the mission ends (the old man states that Gordon is turning fuzzy around the edges, just moments before the mission ends).
Half-Life 2: Episode One[edit]

Half-Life 2: Episode One rejoins Freeman and Alyx Vance as they attempt to escape from City 17, doomed by the destruction of the Citadel's dark fusion reactor at the end of Half-Life 2. At the beginning of the game, the G-Man appears once more to Gordon, but this time, he is interrupted by the appearance of a group of chanting, purple-glowing Vortigaunts, who take Gordon and Alyx away while blocking the G-Man's path. The G-Man appears most displeased by this development, and responds by scowling and darkly stating "We'll see... about that!"
Gordon regains consciousness under a pile of rubble and is found by Alyx and Dog. It is quickly revealed that the only way to escape the Citadel's explosion, which would obliterate virtually all of City 17 and then some, is to contain the Citadel Core which would stall the structure's detonation long enough for an escape. Gordon and Alyx attempt to do so, discovering in the process that the local Combine forces were deliberately trying to overload the Citadel's reactor in order to send a distress message to the Combine Overworld since the teleport core had been destroyed in Half-Life 2. The Combine apparently consider this an acceptable outcome, considering the damage the Citadel had already taken; the subsequent explosion would destroy all of City 17 and much of the surrounding countryside which has been all but lost to human Resistance forces. Gordon and Alyx avert the destruction for a few hours and manage to escape the Citadel with a copy of the distress message and meet up with Barney and other survivors.
The pair eventually escape City 17 via an evacuation train as the Citadel goes critical. Evidently, the Combine message is successfully transmitted while several Combine Advisor pods escape from the Citadel at great speed. The train carrying Freeman and Alyx is still close to the city and is hit by the shock wave as the Citadel is destroyed. Their subsequent fate is revealed in Episode Two.
Half-Life 2: Episode Two[edit]

Episode Two begins almost directly where the previous episode ended. The train Gordon and Alyx were escaping on was caught in the shock wave from the Citadel explosion and derailed. Gordon and Alyx crawl out and begin to make their way to White Forest, the Resistance base where Eli Vance, Dr. Kleiner, and Dr. Arne Magnusson are waiting for them, encountering many obstacles on route.
Early in the journey, Alyx is severely wounded by a Hunter and only survives through the aid of several Vortigaunt allies. Alyx is saved through the use of a miraculous larval extract that Gordon retrieves from the Antlion hive. The G-Man briefly reappears to Gordon revealing that Alyx was under his watch as well - that he had "appraised" her and "plucked her from Black Mesa". He requests that Gordon safely escort her to White Forest as repayment for his own survival without explaining the reasons. He then proceeds to whisper to the unconscious Alyx an instruction to relay the message "Prepare for unforeseen consequences" to her father (this refers to the Resonance Cascade in the original Half-Life). Once Alyx recovers, they make their way to White Forest.

The journey is far from smooth, as Gordon is required to travel through a Headcrab-infested mining settlement that was used as a rebel outpost in order to retrieve a car to be used to make travel much faster. Then, on the road, the two encounter a radio tower and Alyx decides to send a warning about Combine forces they had witnessed heading in White Forest's direction. They linger for too long, however, and are ambushed by Hunters. They later encounter a Combine Advisor in incubation who almost kills them when they destroy its life support but escape through sheer luck before being chased by a Hunter-Chopper into another rebel outpost. Gordon is then required to deal with a Combine Autogun while Alyx and the rebels repair their car. The Combine then set up a force shield ambush at the White Forest Inn where Gordon and Alyx are outnumbered and surrounded but manage to fight through.
Finally upon arrival at White Forest, Alyx gives Dr. Kleiner the data packet she retrieved from the City 17 Citadel before its destruction and Gordon is enlisted to help defend the base from a unexpected Combine infiltration. The data reveals the existence of the Borealis, an Aperture Science vessel thought to have been lost and containing some sort of advanced portal technology that Dr. Kleiner insists should be used against the Combine while Eli, haunted by the Black Mesa Incident, insists upon its destruction.
After Gordon destroys a Hunter/Strider assault force in order to protect Dr. Magnusson's rocket launch, Dr. Magnusson is able to use the data in his satellite which, using the old Black Mesa Array, is able to shutdown the Combine Superportal before it could open fully, which would have allowed a second Combine invasion. As Gordon and Alyx prepare to depart for the Borealis, two Combine Advisors rip through the base and kill Eli. Fortunately Dog reappears in time to rescue Alyx and Gordon from the same fate. The episode ends with Alyx weeping over her father's body, with the possibility that the Combine have now learned everything about the Resistance through Eli.
Half-Life: Alyx[edit]
Gordon is not the playable protaganist in Alyx, the eponymous character instead filling that role, but he appears in a brief cameo during the climactic ending of the game. Before the G-Man offers his proposal to Alyx, he shows her a phantom shadowy image of Gordon as he describes him as being someone who was unable or unwilling to carry out his tasks, alluding to Gordon's ostensible disobedience following his rescue by the Vortigaunts in Episode One.
Gordon also appears in the post-credits scene, this time being controlled as the player character. Following Alyx's seeming acceptance of the G-Man's offer and her placement in stasis, Gordon regains consciousness moments after Episode Two's ending except with the sequence of events now having been altered; Eli is still alive while Alyx is missing. Eli realizes that the G-Man allowed his life to be saved at the cost of Alyx's freedom. He curses the G-Man, saying that he's going to kill him, and as Dog enters the hangar and brings him a crowbar, the game closes as he hands it over to Gordon and tells him that they have work to do.
Relationships[edit]

Isaac Kleiner[edit]
Dr. Kleiner was Gordon's teacher at MIT and recommended him to Black Mesa, where they likely worked together. After the Combine invasion of Earth, Gordon once again worked alongside him, this time in the Resistance. Kleiner feels genuine concern for Gordon on his travels yet still foolishly puts Lamarr first on a few occasions.
Eli Vance[edit]
Eli knew Gordon well at Black Mesa; they both worked in Sector C. After the Resonance Cascade, Eli was the one who opened the door for Gordon to head towards the surface in search of help. That was the last Eli would see of Gordon until he showed up at Black Mesa East twenty years later. They forged a stronger bond throughout Episode One and Two, due to the fact that Alyx was with Gordon most of the time. At one point in Episode Two, Eli tells both Alyx and Gordon, "now that the suppression field is down... we all have to do our part". The extremely candid statement shows how Eli feels about him. Shortly before his death, he tells Gordon not only about his encounter with the G-Man, confirming that the G-Man does exist on some level, but also that he could not be prouder of Gordon if he were his own son. In the post-credits scene of Half-Life: Alyx, Eli and Gordon team up to get Alyx back.
Alyx Vance[edit]

Relatively speaking, Alyx and Gordon have not actually known each other for a very long period. Alyx says to Gordon that he probably does not remember her, indicating he briefly met her (likely at Black Mesa) when she was an infant. But after going through such intense life and death combat situations and other hardships, they have forged a very strong relationship with each other. Alyx has shown affection to Gordon several times throughout the series: Twice giving a sad goodbye at an elevator, and hugging Gordon when Dog pulls him from the rubble.
Barney Calhoun[edit]

Barney and Gordon go way back, being old friends at Black Mesa. When Dr. Kleiner would lock himself out of his office, the two would race to be the first to get the door open, with Gordon usually making use of the ventilation ducts to get in. They also see each other once in Half-Life and Blue Shift, each game depicting the scene from their own respective perspective. In Blue Shift, Gordon silently nods to Barney as he passes by in a tram. In the Combine-controlled world, Barney, undercover, saves Gordon from a terrible fate when Gordon nearly boards a train to Nova Prospekt. Gordon then joins Barney in assisting the Resistance. He still owes Gordon a beer.
Arne Magnusson[edit]
The work relationship between Gordon and Magnusson is relatively unknown, but Arne did harbor a grudge about Gordon destroying his casserole on the day of the Resonance Cascade. In the aftermath of the Citadel's collapse, Gordon becomes an assistant to the Doctor at White Forest in order to get the rocket being constructed there into space. Near the end of Episode Two, Dr. Magnusson finally has to swallow his pride and actually show appreciation to Gordon for what he did.
Judith Mossman[edit]
Gordon and Judith both applied for the same position at Black Mesa. Gordon won out with his Innsbruck experience, and even later during the Combine occupation she is still jealous, at least according to Alyx.
Personality and skills[edit]

Since Gordon does not say a single word during the entire saga and is almost always in the player's control, it is not clear to what extent he exists as a separate character outside of the player's influence. Since the start of Half-Life, Valve has made sure that the player's and Gordon's experience are one and the same. An example of Valve's player strategy is shown during the scene in Eli's lab. Investigation of certain props (most notably the newspaper board) triggers Eli to give some explanation to their meaning and history, thus indicating that Gordon presents emotions that the non-player characters can detect.[14] In contrast, the chapter Captive Freight from Blue Shift shows an example of the character apparently speaking but being unheard by the player, in this case playing as Barney Calhoun. When Rosenberg asks how Barney knows his name, there is a slight pause, then Rosenberg confirms the name of the scientist who told it to Calhoun, as if answering him.
Although seeming to be an expert with weapons and explosives (turning into a "one man army" during the course of the games, much like in most FPS games), Freeman had actually not handled any weapons until some cursory training at the Black Mesa Research Facility's Hazard Course (aside from the butane-powered tennis ball cannon he constructed at age 6).[1] What separates Gordon Freeman from other games' heroes is that he is a scientist – a rather unlikely kind of hero when compared to more traditional video game characters such as Duke Nukem, or soldier types in many other games, such as the Doomguy or the Master Chief.
Behind the scenes[edit]

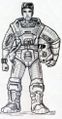
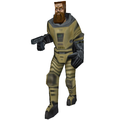
- Gordon Freeman's original appearance was designed by Dhabih Eng and Chuck Jones. His original model had a full, wild beard that earned him the nickname of "Ivan the Space Biker". The beard eventually turned into a stylish goatee, while his glasses also went through several iterations. The Freeman model for Half-Life and Opposing Force also features a small ponytail, absent from the subsequent models. The goatee and ponytail were chosen by Chuck Jones, when Mike Harrington suggested him to take inspiration from his own appearance.[6][15]
- The name "Gordon Freeman" was coined by Gabe Newell. When looking for a name for the character, Marc Laidlaw wanted it to evoke some famous scientists, so he took inspiration in the names of his "heroes": the name of physicist/philosopher Freeman Dyson mixed with that of the French mathematician Jules Henri Poincaré, ending up with "Dyson Poincaré". Gabe Newell apparently disliked it and suggested "Gordon Freeman" instead.[6]
- Gordon's model in Opposing Force sports a pair of glasses identical to one seen on an earlier model for Half-Life.
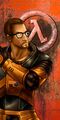
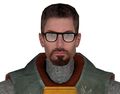
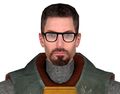
- Freeman's Half-Life 2 appearance was solely designed by Dhabih Eng. His face was created from the faces of several Valve employees morphed together: David Speyrer, Eric Kirchmer, Greg Coomer and Kelly Bailey.[6]
- Freeman's Half-Life: Day One model is identical to the Half-Life one, except that it has "gender" bodyparts. The "male" version is Gordon, and the "female" is an early
gina.mdl/holo.mdl. Furthermore, it has an animation removed from the more recent models, named "ambushplayer", consisting of Freeman being hit twice, then falling on the floor, unconscious. This may be related to the end of the Half-Life chapter Apprehension, during which Freeman experiences the same thing. The Day One files also contain two small avi files, "gordon.avi" and "gina.avi", consisting of a higher resolution version of the "male" / "female" player model turning on itself, but with the HEV Suit helmet in their hands.
- While in the GoldSrc games Gordon and any other playable character have a fully detailed third person model, the Source version of Gordon's model has only been used in the arcade game Half-Life 2: Survivor. Although it hasn't been included in any of their own games, this model has been used as the basis for concept art images and portraits for Gordon made by Dhabih Eng, including the Half-Life 2 cover. Outside of Survivor, the Source games feature a simplified version of the Half-Life model. It is entirely covered in the
PLAYER_Chrome1texture used for the reflective parts of the model's HEV Suit, and the ponytail is missing. It also features five animations from the original model, but only the idle and death animations can be observed in-game. Half-Life: Alyx uses a new Gordon model, with animations of him picking up his glasses from the ground.
- According to Marc Laidlaw, the Gordon Freeman character is "just a name", an eyepiece looking into the Half-Life universe, a motive force that enables the player to move through it. The team just wanted to create somebody who didn't get in the way of the player exploring on their own yet feeling like they had a specific role - never quite sure that they were playing it right, but having it as part of the whole experience.[16] This is the main reason why most playable characters in the Half-Life and Portal universe are silent.

- The first name "Gordon" is a Scottish surname which was originally derived from a place name meaning "great hill".[17] "Freeman" is a common English surname which originally referred to a person who was born free, or in other words was not a serf,[18] and not subject to the will of another. This is a rather ironic title to be given to Gordon, since he is 'involuntarily' serving the G-Man. On the other hand, it does make sense in that Freeman unknowingly sets the Vortigaunts free from the Nihilanth in Half-Life and sets humanity (and their new Vortigaunt allies) free from the Combine rule in Half-Life 2. The Vortigaunts refer to Gordon as "the Freeman" and in one of Dr. Breen's announcements, he mentions that people are starting to refer to Gordon as "the One Free Man, the Opener of the Way".
- While older sources state that Gordon only started work at Black Mesa on May 15 (the day before the Black Mesa Incident),[3] Half-Life 2 and its episodes retconned this, implying that Gordon was already working for some time at Black Mesa before the incident: Barney tells Gordon he owes him a beer and reminds him who he is when first meeting in the City 17 Trainstation, and Alyx tells in the City 17 Underground that Gordon and Barney would compete in air ducts to get into Kleiner's office whenever he got himself locked out, among others.
- The portion of a text seen in E3 video "Psyche" makes mention of muscular catatonia and Gordon, among other things.
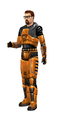
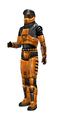
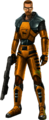
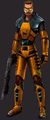
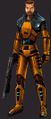
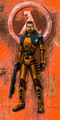
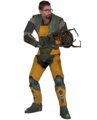
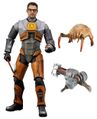
- A 7'' (c. 17.7 cm) action figure of Gordon Freeman was released by NECA in September 2012. It includes over 20 points of articulation, two sets of interchangeable hands, a crowbar, a pheropod, a Gravity Gun and a Classic Headcrab.[19]
- In the playable Half-Life 2 leak sound files, Judith Mossman can be heard mentioning that Gordon is "already someone's puppet", possibly in reference to the G-Man.
Trivia[edit]


References in other media[edit]
- In Splinter Cell: Chaos Theory, Anna Grimsdóttír remarks to protagonist Sam Fisher that "crowbars are for geeky video-game characters", poking fun at the fact that Gordon Freeman is a scientist by profession.
- In Call of Duty: United Offensive, two American soldiers are shown running side-by-side. On the left, Pvt. Gordon, and on the right, Pvt. Freeman.
- In the Stark Towers level of the video game The Punisher, a scientist refers to another scientist as "Doctor Freeman" and asks what a noise he heard was, to which Doctor Freeman replies (paraphrased) "maybe the quantum physics department finally opened that extradimensional portal!", with the other scientist replying "Extradimensional aliens! Wonder what they look like?", a reference to the opening scene of Half-Life.
- In The Ship, a game developed using Source, the description of the crowbar weapon states it is suitable for any "free man".
- In Destroy All Humans, the main character, Crypto 137, can read the thoughts of humans. If he scans the mind of a scientist, the player may hear "I must hurry, they need me in the test chamber! Oh wait, wrong game."
- In TimeSplitters: Future Perfect, during the level "Breaking and Entering", Cortez, the protagonist of the story, changes into a lab coat along with a name tag that reads "Dr. Freeman". He is also told, "remember, your name is Gordon, now lead on doctor."
- In S.T.A.L.K.E.R.: Shadow of Chernobyl, the player may find the body of a scientist named "Gordon Freeman" whose PDA makes mentions of Black Mesa, City 17, and a crowbar.
- In Simcity (2013), a low density factory may be called "Freeman Crowbar Mfg".
- In Metro 2033, a skeleton can be found, with a pair of glasses and a crowbar at its side.
- In the novel A Big Boy Did It and Ran Away by Christopher Brookmyre, the author makes frequent references to various video games including Half-Life; one of the protagonists takes the alias of "Gordon Freeman" while there is an SAS soldier named "Shepard" (a reference to Half-Life: Opposing Force’s Adrian Shephard). At one point the male protagonist is equipped with a crowbar and the main action takes place in a largely underground hydroelectric power station with the Gaelic name "Dubh Ardrain" which can be translated as "Black Mesa".
- In the Left 4 Dead 2 downloadable campaign The Passing, Louis will sometimes say "Man, I feel like Gordon Freeman!" when equipped with a crowbar.
- In the game Unturned, there is a crowbar which is usable as a weapon. The description of this item is "Fordon Greeman's favorite weapon."
- In Red Faction: Guerrilla, near the upgrade table of a safehouse, a radio operator will occasionally say "Cut the chatter Freeman, we need radio silence."
- In Team Fortress 2, as part of the Swamp Theme collection of assets, an included sign material as well as an airboat model make mention of a business called "Freeman Airboat Tours", a reference to Gordon and his use of the Airboat in Half-Life 2.
- In Control there are multiple crowbars scattered throughout the game. An inscription on the side of the crowbars read, Freeman Tools, a clear reference to Gordon.
Gallery[edit]
Models[edit]

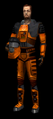
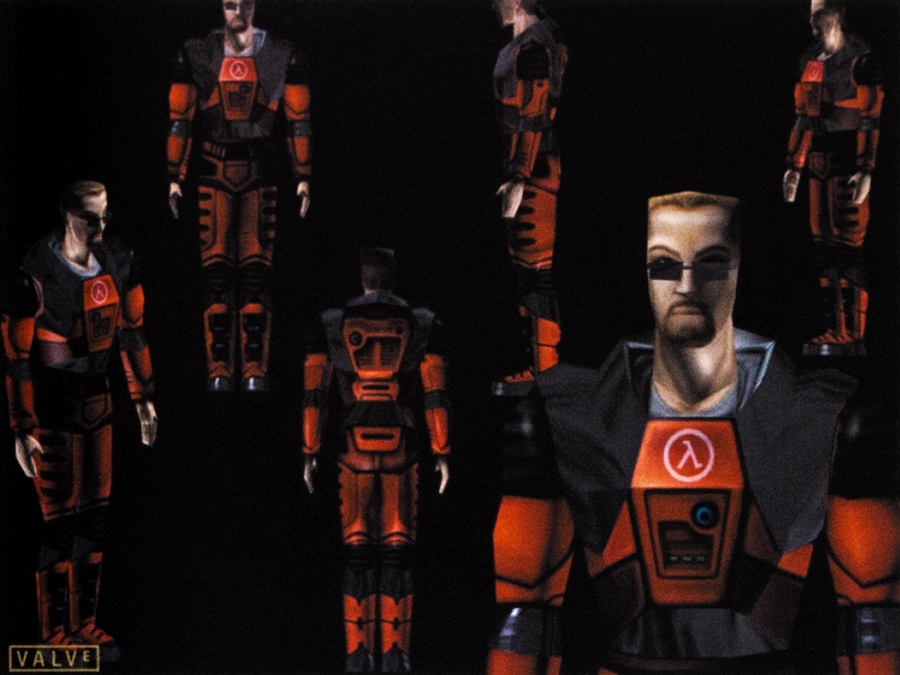
Half-Life model.
With helmet.
Dreamcast version.
With helmet.
PlayStation 2 version.
With helmet.
Gordon, multiplayer model.
Preview image.

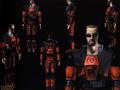
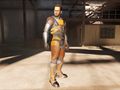
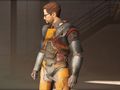
Opposing Force model.
Lab coat model in Blue Shift.
HD version.
Head-to-Head portrait.
Memory card icon.


Half-Life[edit]
Gordon on the Steam header for Half-Life.
Concept art.
Original model, nicknamed "Ivan the Space Biker", designed by Chuck Jones.

Early model of the Gordon.
Early model with red version of the HEV Suit.
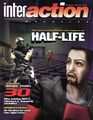
Gordon on cover of InterAction magazine.
Early box art.

The final version.
Artwork from the box art without the background.
Ditto, version with glasses.
Artwork of Gordon holding the shotgun.
Ditto.
Ditto, without glasses.
Variant turned into a trophy, used on Sierra's official website in 1999 to promote Half-Life’s "Game of the Year" status.
Promotional art featured in the inside cover of Half-Life, Game of the Year Edition (original picture, reversed and with a different background).
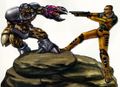
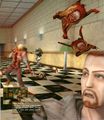
Promotional art featuring Gordon facing off against an Alien Grunt.
Early hi-res model render, with red HEV Suit.
Hi-res model render, from the Day One avi file.
Old model with red HEV Suit and shotgun.

Ditto.
Early multiplayer match with Gordon's model.
Ditto.
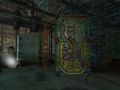
Gordon's locker door.
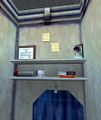
Gordon's locker contents in Half-Life.
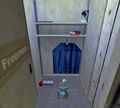
Gordon's locker after the Resonance Cascade.

The Half-Life menu background, legacy Steam version.

25th Anniversary Update wallpaper.
Ditto.
Ditto.
Ditto, phone wallpaper.
Ditto.

Achievement icon for the 25th Anniversary Update site.


Expansions and Ports[edit]

Promotional image, set in Silo D, made for GamePro to promote the Dreamcast version of Half-Life.

Gordon on his way to Anomalous Materials as seen by Barney Calhoun.
Gordon as seen by Barney Calhoun in a security camera in Blue Shift.

Gordon's room in the Level 3 Dormitories in Decay.
Ditto, inside the room.
A book titled The Truth About Aliens. The same book can be found in Barney Calhoun's locker in Blue Shift.

Gordon's "employee of the month" photo in Opposing Force.
Ditto, texture file.
Gordon jumping into the portal, as seen in Opposing Force.
Gordon on Xen, as seen in Opposing Force.
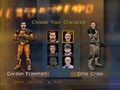
Gordon in Head-to-Head game mode on PlayStation 2 version.
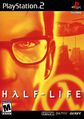
Gordon on Half-Life's PlayStation 2 cover.
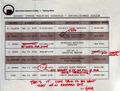
Hazard Course Training schedule.

Gordon on the Steam portrait for Half-Life: Source.

Gordon on the Steam portrait for Half-Life Deathmatch: Source.


Half-Life 2 story arc[edit]
Half-Life 2 model[edit]

Speyrer and Kirchmer morphed together.

Coomer and Bailey morphed together.

Speyrer, Kirchmer, Coomer and Bailey morphed together.

Speyrer, Kirchmer, Coomer and Bailey morphed together, with changes.

Final result: Gordon Freeman model's head. It is used as the basis of several concept art images such as that of the Half-Life 2 original cover.

High-res facemap released as part of the 2016-2017 leak.
Model render used for for promotional artwork paint over.
The Gordon model used in Half-Life 2: Survivor based on the Valve employee head construction.
Survivor model, bust.
Ditto, with the leaked high-res facemap.


Half-Life: Alyx[edit]
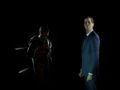
The G-Man summons an image of Gordon before Alyx.
Gordon's model in Half-Life: Alyx.
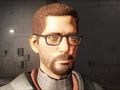
Ditto, close-up.
The various wounds Gordon has received as evident by his suit.
Gordon in the test chamber as depicted in Gary's mural.


Miscellaneous[edit]
Stained glass of Gordon and his crowbar in the E3 2003 map in
e3_techdemo_5, reused with small changes for Counter-Strike: Source's "Video Stress Test".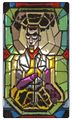
Stained glass model.

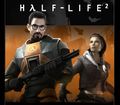
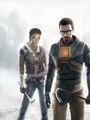
Freeman on the cover of Half-Life 2.

Full cover art.
Gordon and Alyx on the cover of Half-Life 2, "game of the year" edition.

Gordon and Alyx on the Steam header for Half-Life 2.
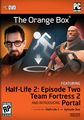
Freeman on the cover of The Orange Box.
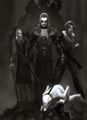
Concept art of Eli Maxwell, Gordon Freeman, Alyx Vance, Skitch - and Dog in the back, made during the first year of Half-Life 2's development.
Early console background for Half-Life 2, based on the previous picture.
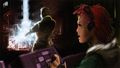
Concept art of Alyx Vance and Gordon Freeman in the Citadel.
Concept art of Gordon hiding from the Combine on the Borealis.
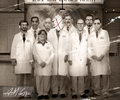
The Anomalous Materials team before the Black Mesa Incident. Gordon is the second from the right.

Ditto, high resolution version.
Concept art of Gordon and Alyx and their basic weapons.
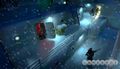
Concept art of Gordon Freeman in the City 17 rubble.
Concept art.
Concept art of Gordon arriving at the foot of the Citadel.
Gordon Freeman holding the Consul at gunpoint while Elena Mossman is holding Alyx Vance.
Promotional art of Gordon and Alyx chased by Hunters.

Half-Life 2: Deathmatch "Free Man" spray.
Third person model, identical to the GoldSrc model except for the textures.
Third person model used in Hammer for the "info_player_start" class, i.e. where the player will start in the compiled map.
Gordon Freeman statue at Valve, July 2008.
Gordon Freeman and Alyx Vance surrounded by early textured Antlions.
Gordon Freeman image given on Valve's Facebook page for GameSpot's All Time Greatest Video Game Hero. It is based on the previous image.
March 2010 image of Gordon Freeman and his crowbar promoting the arrival of Steam on Mac, sent by Valve to MacRumors. The Apple logo can be seen in place of the Lambda logo on the HEV Suit.
Gordon Freeman action figure, by NECA.

Steam emoticon of Gordon.
Unused Steam trading card artwork.

Unused Steam emoticon.

Artwork promoting the Half-Life: Alyx announcement in November 2019, with Gordon and Alyx's kiss under the mistletoe spoiled by a Barnacle.
Steam 20th Anniversary artwork parodying The Return of the King.


List of appearances[edit]
Main games[edit]
- Half-Life
- Half-Life: Opposing Force
- Half-Life: Blue Shift
- Half-Life: Decay (Mentioned only) (Door name only)
- Half-Life 2
- Half-Life 2: Episode One
- Half-Life 2: Episode Two
- Half-Life: Alyx
Other[edit]
- Half-Life: Day One (First appearance)
- Half-Life: Uplink (Non-canonical appearance)
- Half-Life 2: Raising the Bar
- Half-Life 2: Lost Coast (Non-canonical appearance)
- Source Particle Benchmark (Non-canonical appearance)
- The Final Hours of Portal 2
- Randolph the Red-Nosed Turret (Name only) (Non-canonical appearance)
References[edit]
- ↑ 1.0 1.1 1.2 1.3 1.4 1.5 Half-Life 2 Prima Guide
- ↑ 2.0 2.1 2.2 2.3 2.4 2.5 Half-Life
- ↑ 3.0 3.1 3.2 3.3 3.4 Half-Life PlayStation 2 instruction manual
- ↑ 4.0 4.1 Interview with Marc Laidlaw on PC Gamer Online (archived)
- ↑ 5.0 5.1 Half-Life 2 Xbox Prima Guide
- ↑ 6.0 6.1 6.2 6.3 6.4 6.5 6.6 6.7 Half-Life 2: Raising the Bar
- ↑ Half-Life: Decay
- ↑ Gordon Freeman's locker contents
- ↑ A Day With Valve on Wavelength (archived)
- ↑ Info received from Valve ONLY on the ValveTime Forums
- ↑ Half-Life 2: Episode Two
- ↑ Half-Life 2: Episode One: The story so far on Half-Life2.com (archived)
- ↑ Barney: "Doc, since he's not taking the streets, you might as well get him out of his civvies." Chapter: "A Red Letter Day", Half-Life 2 (Barney Calhoun Quotes)
- ↑ Half-Life 2 Chapter: Black Mesa East
- ↑ Half-Life: 25th Anniversary Documentary
- ↑ PC Interview: Marc Laidlaw - Valve Software's plot man and the guy who puts story in front of the crowbar on ComputerAndVideoGames.com (December 23, 2006) (archived)
- ↑ Gordon on BehindtheName.com
- ↑ Freeman on BehindtheName.com
- ↑ Half-Life Gordon Freeman 7" Action Figure on NECAOnline.com (archived)